Best Way to Remove Ceramic Floor Tile
Turn off the water and cut power before starting, then wear goggles, gloves, and knee pads for safety. Begin in a corner, using a hammer and bolster chisel at a 45-degree angle to break tiles, prying up sections where thinset is weak. Scrape remaining adhesive with a long-handled floor scraper or demo hammer, treating stubborn spots with a heat gun. Repair any subfloor damage, vacuum debris with a HEPA filter, then wipe down with a tack cloth-next steps reveal how to guarantee your base is perfectly prepped.
We are supported by our audience. When you purchase through links on our site, we may earn an affiliate commission, at no extra cost for you. Learn more. Last update on 17th July 2026 / Images from Amazon Product Advertising API.
Notable Insights
- Shut off water and power, then wear protective gear like goggles, gloves, and knee pads before starting tile removal.
- Score grout lines with a utility knife and use a hammer and chisel at 45 degrees to break tiles in a corner.
- Pry up broken tiles with a pry bar, focusing on sections with weak thinset for easier removal.
- Scrape leftover adhesive with a floor scraper or demo hammer, using heat or chemicals for stubborn residue.
- Inspect and repair subfloor damage, then clean thoroughly with a HEPA vacuum and tack cloth.
Turn Off Water and Wear Safety Gear
Before you start prying up tiles, make sure to shut off the water supply by turning the shutoff valve clockwise until it stops, especially if you’re working near sinks, toilets, or tubs-this prevents accidental leaks or flooding during demolition. You’ll also want to turn off water to washing machines or dishwashers nearby. Always wear safety gear: use ski goggles for full eye protection, a dust mask, and heavy-duty gloves. Protect your knees with thick pads when kneeling on concrete, and wear long sleeves, closed-toe shoes, and protective clothing to guard against sharp fragments. Don’t forget to cut power to nearby outlets, too-especially if using a demo hammer. Proper prep keeps you safe and lets you focus on clean, efficient removal. Testers report fewer injuries and faster progress when fully geared up.
Remove Ceramic Floor Tiles With Hammer and Pry Bar
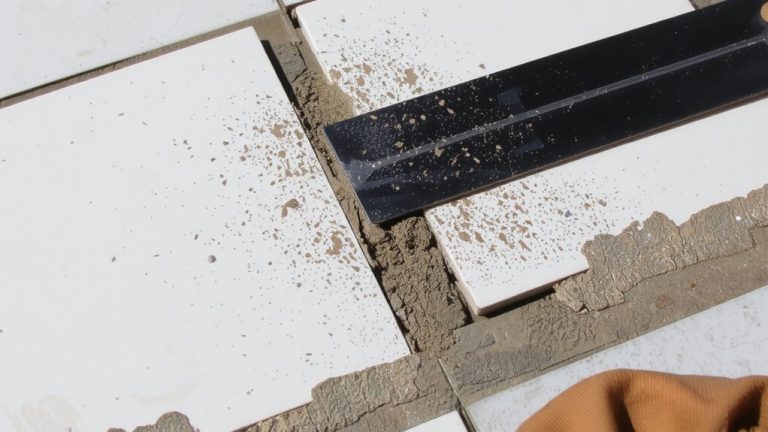
Once you’ve prepped the area and scored the grout lines with a utility knife, it’s time to break up the ceramic tiles using a hammer and bolster chisel held at a 45-degree angle-you’ll want to start in a corner to maintain control and prevent damage to surrounding areas. Use the hammer to crack tiles into manageable pieces, then wedge the pry bar under broken edges to lift them, especially where thinset is weak. This method makes it easier to remove ceramic floor tiles without excessive subfloor damage. Wear ski goggles, gloves, and a dust mask-flying shards and fine debris are dangerous. On older floors, 20-year-old tiles may resist, bonded by hardened mortar, so expect to rely heavily on the hammer and chisel. Work systematically across the room, alternating between breaking and prying. The pry bar’s leverage is key for efficient removal, letting you clear sections quickly while minimizing strain.
Scrape Off Thinset and Repair the Subfloor
Even if you’ve already pulled up the last tile, your work’s not done until you tackle the stubborn thinset left behind, especially when dealing with a full 8×15 ft area coated in decades-old adhesive. You’ll need to scrape off thinset using a long-handled floor scraper-it’s the most efficient tool for large sections of hardened 20-year-old mortar. For thick buildup near the old vanity, break up the layers with a demo hammer rented from Sunbelt Rentals. If residue resists scraping, apply a heat gun or chemical remover with proper ventilation to loosen the bond before grinding down uneven spots. Once the surface is clean, inspect the subfloor thoroughly: check for water damage, rot, or structural issues. You’ll also need to repair the subfloor if damaged-like the hole found in the slab, confirmed by a plumber as a capped pipe, now safe to cover with new cement.
Vacuum Debris and Prepare for New Flooring
You’ve busted up the old ceramic, scraped off the stubborn thinset, and patched the subfloor-now it’s time to clean up the mess so your new floor has a solid, smooth base to stick to. Use a shop vacuum to remove every speck of dust, tile shards, grout fragments, and adhesive residue-especially in an 8×15 foot zone where debris hides in corners. A clean tile floor surface prevents bonding issues and guarantees a level install. Inspect the slab or subfloor: check for damage like the hole found near the original vanity. Remove all loose material before laying new floor tiles.
| Area (sq ft) | Tool Used | Debris Removed |
|---|---|---|
| 120 | Shop Vacuum | Dust, CERAMIC fragments |
| 120 | HEPA Filter | Fine particulate |
| 120 | Microfiber Mop | Residual grime |
| 120 | Flashlight | Hidden cracks or holes |
| 120 | Tack Cloth | Final surface prep |
On a final note
You’ve cleared the tile, now clean the subfloor with a wire brush and vacuum, using a shop vac for 99% dust removal. Wipe with a damp cloth, then check for pests or moisture spots-replace any soft subfloor areas. Use a pH-neutral cleaner like Simple Green for final wipe-downs, and let dry 24 hours. Test levelness with a 4-ft. straightedge; repair dips over 1/8 inch with cement-based patch. You’re ready for new flooring.