Best Thinset for Backsplash
You’ll want a polymer-modified, non-sag thinset like Custom ProLite for your backsplash-it’s ANSI A118.15-rated, delivers 450 psi bond strength, and won’t slip on vertical walls. Use white thinset for glass tile to prevent graying, and apply with a 1/4″ x 1/4″ trowel over drywall or cement board. It’s lightweight, adheres securely, and stands up to kitchen heat and moisture. Pros trust it for porcelain and mosaic installs, too-there’s more to get right with adhesive prep than most realize.
We are supported by our audience. When you purchase through links on our site, we may earn an affiliate commission, at no extra cost for you. Learn more. Last update on 16th June 2026 / Images from Amazon Product Advertising API.
Notable Insights
- Use polymer-modified, non-sag thinset like Custom ProLite for strong adhesion on vertical backsplash walls.
- Choose white thinset to prevent discoloration under translucent or light-colored glass tiles.
- Ensure the thinset meets ANSI A118.15 for high bond strength (over 400 psi) with heavy or non-porous tiles.
- Opt for thixotropic (T-rated) thinset to prevent slippage and ensure even coverage on drywall or cement board.
- Apply with a 1/4″ x 1/4″ square-notched trowel and allow 24–48 hours cure time before grouting.
Choose the Right Adhesive for Your Backsplash: Thinset vs Mastic
While you might be tempted to use mastic for your kitchen backsplash because it’s easy to spread on vertical surfaces, it’s not the best choice-especially in areas exposed to heat, steam, or moisture, where it can soften over time and lead to tile failure. Mastic may seem convenient, but it’s not a reliable adhesive for wet zones or with glass tile, which needs a stronger, more durable bond. Instead, go with a modified mortar like Schluter Allset-a high-performance thinset that bonds well even over drywall and works with waterproofing membranes. Avoid unmodified mortar; it requires a cement-based backer board and fails on gypsum. For glass or light tiles, use white thinset to prevent discoloration; gray thinset works fine for darker tiles. Prolite, an ANSI A118.15 lightweight thinset, is also excellent for porcelain or mosaics on walls.
Match Your Tile Type to the Best Thinset
If you’re tiling a backsplash, picking the right thinset for your tile type makes all the difference in preventing cracks, pops, or staining down the line-you can’t just grab any mortar off the shelf and expect it to hold. For glass tile, always use a white thinset-gray pigments can show through and stain. You need a polymer-modified thinset with high bond strength, like Custom ProLite, which delivers 450 psi and meets ANSI A118.15. That’s the best thinset choice for wall tile installations. Porcelain tile also demands modified mortars, especially on verticals-go for a thixotropic, non-sag formula to prevent slippage. Custom ProLite works great here too, offering superior grip and durability. Skip unmodified thinset mortar-it lacks the adhesion and flexibility needed. When setting a 2×4 mosaic, stick with a wall-rated, modified thinset for long-term performance.
Why ProLite Thinset Wins for Glass and Porcelain
You’ve already matched your tile type to the right thinset, and now it’s time to see why Custom ProLite stands out when you’re working with glass or porcelain backsplash tile. ProLite is a high-performance, ANSI-compliant thinset with over 400 psi bond strength, making it ideal for non-porous surfaces like glass tile and dense porcelain tile. Unlike mastic, this polymer-modified Tile Adhesive is specifically approved for glass, ensuring long-term durability. Its non-sag, thixotropic formula sticks firmly to vertical surfaces, so you won’t worry about slippage on your kitchen backsplash. Lightweight and efficient, one 30-pound bag covers as much as a 50-pound standard bag, saving you effort and trips to Home Depot. Testers love how easily it trowels on, holds heavy tiles, and cures reliably over drywall or cement board-no sag, no failure, just strong, lasting adhesion you can trust.
What ANSI Ratings Mean for Your Kitchen Backsplash
Since not all thinsets are built to handle the unique demands of a kitchen backsplash, knowing the ANSI rating on the bag makes all the difference in whether your tile stays put for years or fails prematurely. You’ll want a modified Thinset with at least ANSI A118.4, delivering 200 psi bond strength for reliable adhesion on drywall. For heavier tiles or glass tile installations, step up to ANSI A118.15-brands like ProLite offer over 400 psi bond strength, ideal for durability. Look for the “T” suffix, indicating thixotropic, non-sag properties so your Thinset won’t slide on vertical walls. Use white Thinset if you’re setting light-colored or translucent glass tile, preventing gray discoloration from gray mortar. Testers confirm that pairing high bond strength with thixotropic, white, modified formulas guarantees a clean, lasting kitchen backsplash every time.
How to Apply Thinset on Drywall (Safely)
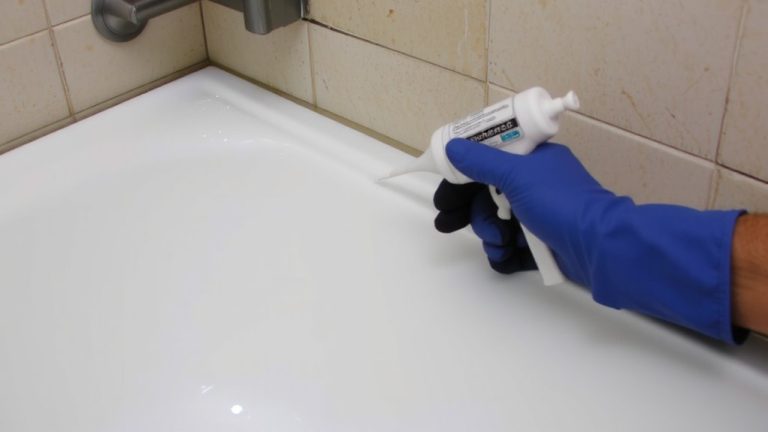
Though drywall alone isn’t suitable for backsplash tile, you can safely apply thinset when it’s covered with a cement-based backer board like HardieBacker or Durock-this creates a stable, moisture-resistant base that prevents adhesive failure and swelling. Always prep by removing gloss or texture from existing drywall and apply a waterproofing membrane such as RedGard near sinks or stoves. Use a polymer-modified, non-sag thinset like Custom Building Products’ Versabond LFT, ideal for vertical surfaces and ANSI A118.15 compliant. Mixing small batches guarantees consistent workability. Apply with a 1/4″ x 1/4″ square-notched trowel for full coverage on 2″ x 4″ mosaics, minimizing slippage. This lightweight, polymer-modified formula bonds well to backer board and supports dense porcelain or glass tiles. Let cure 24–48 hours before grouting.
On a final note
Use ProLite Thinset for a strong, waterproof bond on glass or porcelain backsplash tiles, especially over drywall. It meets ANSI A118.4 for non-sag, so tiles stay put during set-up. Mix with water to a mayonnaise-like consistency, apply with a 3/16″ notched trowel, and allow 24 hours to cure. Clean residue with a damp sponge before it hardens. Real testers report zero slips or cracks, even in moist kitchens.