Best Way to Clean a Used Fish Tank
Drain your used fish tank completely-siphon large tanks or pour out water under 20 gallons-then remove all decorations, plants, and filter parts, using a gravel vacuum with a soft brush to lift debris from substrate. Rinse gravel with lukewarm water, avoiding soap that leaves toxic residue. Inspect silicone seams and glass with a bright light; fill and test for leaks over 48 hours. Soak the tank in a 1:1 vinegar-water solution for up to two days to dissolve limescale, or use a 1:9 bleach mix for 15 minutes to disinfect-rinse thoroughly until no chlorine smell remains, then apply a full dose of dechlorinator like Seachem Prime. Air-dry in sunlight to break down any residue. For hard water stains, apply vinegar-soaked paper towels or carefully scrape glass at a low angle with a single-edge razor or 1200-grit wet sandpaper. Avoid abrasive pads on acrylic. Clean decorations in a 1:9 bleach soak for 10–15 minutes, then rinse well. Scrub mineral buildup with vinegar and a soft sponge. Rinse filter media in dechlorinated water only-never tap water or soap-to preserve beneficial bacteria. There’s more to get right after this.
We are supported by our audience. When you purchase through links on our site, we may earn an affiliate commission, at no extra cost for you. Learn more. Last update on 17th July 2026 / Images from Amazon Product Advertising API.
Notable Insights
- Drain the tank completely and remove all decorations, plants, and filter parts for separate cleaning.
- Use a gravel vacuum to clean substrate debris and rinse gravel thoroughly with lukewarm water only.
- Inspect silicone seams and glass for cracks or leaks by filling the tank and monitoring for 24–48 hours.
- Sanitize the empty tank with a 1:9 bleach solution or 1:1 vinegar solution, then rinse and air-dry completely.
- Clean decorations and filter components with bleach or vinegar, rinse thoroughly, and avoid soap or abrasives.
Drain the Tank and Remove All Contents
Once you’ve unplugged all equipment and turned off lighting systems, start by draining the tank completely-either with a siphon hose for larger tanks or by carefully pouring out the water if you’re working with a smaller unit under 20 gallons. Now, remove all contents, including decorations, plants, and filter parts, placing them aside for later cleaning. Use a gravel vacuum to clear out debris from the substrate, especially if it’s compacted or deeply soiled-this tool pulls waste efficiently without wasting extra time. Never skip this step, as leftover organic matter can harbor bacteria and complicate sanitization. After removing the gravel, rinse thoroughly with clean, lukewarm water-no soap, ever-to avoid toxic residue. Testers report clearer results when using soft brushes alongside the vacuum, ensuring every speck is lifted. This prep work sets the stage for deep cleaning, making surface scrubbing and algae removal much more effective down the line.
Check the Tank for Cracks and Leaks
You’ve siphoned out every drop and cleared the gravel, decorations, and gear-now it’s time to make sure the tank itself can actually hold water without springing a leak. Before you *check the tank for cracks and leaks*, wipe away hard water stains and let it dry completely. Inspect all silicone seams for gaps or discoloration-compromised seals are a top cause of failure. Shine a bright light along the glass, especially near corners, to spot hairline cracks. Avoid reptile tanks like ExoTerra-they use weaker silicone. Then, fill the tank and place it on a level surface for 24–48 hours.
| What to Check | How to Test |
|---|---|
| Silicone seals | Look for cracks or separation |
| Glass integrity | Use light to find hairline cracks |
| Leaks over time | Mark water level with dry-erase marker |
| Structural safety | Avoid tanks with deep scratches |
Let it dry fully before moving to sanitization.
Sanitize With Vinegar or Bleach Solution
While the tank’s dry and ready for a deep clean, choosing the right sanitizer makes all the difference in tackling bacteria, algae spores, and mineral residue without risking future inhabitants. You can use a 1:1 vinegar and water solution-soak it up to 48 hours to dissolve limescale and sanitize safely. White vinegar breaks down calcium and magnesium deposits while killing microbes, all without toxic fumes. Alternatively, using bleach with a 1:9 solution (one part bleach to nine parts water) disinfects thoroughly in 15 minutes. But you need to rinse, really rinse-until no chlorine smell lingers. Then use a dechlorinator like Seachem Prime at ten times the normal dose. Both methods require complete drying-let the tank air-dry 24 hours, ideally in sunlight, so UV helps break down any leftover residue.
Scrub Off Hard Water Stains and Buildup
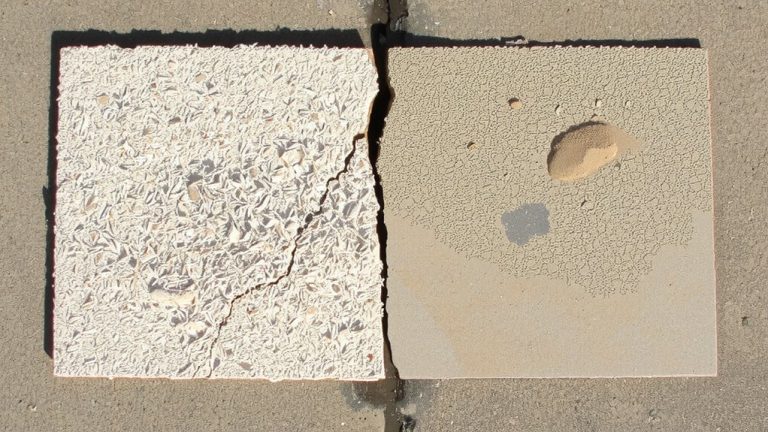
How do you tackle those stubborn white crusts clinging to your tank’s glass? For hard water stains, soak a paper towel in a 1:1 vinegar and water solution and press it against the affected areas for at least 30 minutes-up to 48 hours for thick buildup. This natural cleaning solution loosens mineral deposits so they wipe away easily. For tough spots on a glass tank, gently scrape with a single-edge razor blade at a low angle, or use 1200 grit wet sandpaper to remove all stains safely-glass won’t scratch. If stains persist, try CLR (Calcium, Lime & Rust remover), which works faster than vinegar, but rinse thoroughly to avoid toxic residue. Always wear gloves and eye protection. Never use abrasive pads on acrylic tanks. You’ve got the right tools to restore clarity-no guesswork, just clear results.
Clean and Disinfect Decorations & Filters
Start by removing all decorations from the tank and giving them a quick rinse to knock off loose debris. To clean a used aquarium safely, soak decorations in a solution of 1 part bleach to 9 parts water for 10–15 minutes to kill algae and bacteria. Rinse thoroughly until no bleach smell remains-this step is essential. For tough mineral buildup, use a safe, natural option: apply a vinegar-soaked paper towel with water and vinegar, let it sit 30 minutes, then gently scrub with a soft sponge. When handling filters, never use soap or harsh cleaners. Instead, rinse media in dechlorinated tank water to preserve beneficial bacteria. Sure to check manufacturer guidelines before replacing any parts-often, only damaged sponges need swapping. This method keeps your setup healthy, effective, and ready for new inhabitants without risking chemical exposure.
Rinse and Dry the Cleaned Tank
Once your decorations and filter media are clean and set aside, it’s time to give the tank itself a final rinse and prep it for drying. Rinse the tank thoroughly with warm water to remove any vinegar or bleach residue, making sure every trace is gone-leftover cleaner can harm fish. Drain completely, then wipe down both interior and exterior with a clean paper towel to speed up drying and prevent water spots. Place the tank in a dust-free area where it can dry for 24 hours, ideally in indirect sunlight to help break down any lingering chlorine. Make sure it’s fully dry by touch and sight before moving forward, since moisture can skew water chemistry. This drying window also lets any sanitizing agents fully dissipate, creating a safer environment. Testers confirm that this wait improves stability once the aquarium is running.
Test for Leaks Before Aquarium Setup
While you’ve already cleared out debris and sanitized the surfaces, don’t skip checking the tank’s structural integrity before moving forward-fill the empty, clean aquarium with water to the brim and place it on a hard, level surface, letting it sit undisturbed for 24 to 48 hours to catch any hidden leaks. This is how you test for leaks effectively. Use a dry erase marker to mark the external water level; any drop beyond normal evaporation signals a leak. Keep in mind that silicone seals, glass panes, and joints may look fine when dry but fail when wet. Inspect them closely during the test. Never assume an old fish tank is safe-many reptile enclosures like ExoTerra or ZooMed aren’t built for Fresh Water pressure. Confirm it’s 100% watertight before setup.
On a final note
Once the tank’s dry, wipe down surrounding surfaces with a vinegar-water mix (1:1) to kill residue and deter pests, especially around silicone seams where mold hides. Use a microfiber cloth on glass tops and metal hoods to prevent scratches. For tough stains, a razor blade works, but don’t use it on acrylic. Always rinse bleach-treated parts thoroughly-leftover traces harm fish. Test the full setup for 24 hours before adding livestock. Clean equipment stores better in labeled bins, ready for next time.